
Introduction
Security management is a critically important topic for Workday practitioners. Unfortunately, hackers are becoming more sophisticated, and the business and personal information stored in HRIS systems such as Workday are attractive targets. While Workday has implemented world-class security methods for its application, one needs to be mindful of the security at the integration layer. Whenever data is transmitted between applications, it is vital that this transfer is done in a secure, encrypted manner. Otherwise, integrations can become a security weak link that could be exploited by malicious actors.
This article describes a connectivity process where information is sent from a Workday tenant to a third-party endpoint using a Secure Socket Layer (SSL) Certificate that has been signed by a Workday-approved certification authority (CA). Certificate-based SSL connectivity enhances the security of dataflows between Workday and other applications & services.
Workday does not support self-signed certificates, as this does not meet their security standards. However, they do support a common set of Java root and intermediate CA certificates. You may find the acceptable certificate signers by searching in Workday community.
The process of creating and managing 3rd party certificates for Workday integrations is not intuitive, so in this article, we will walk through a detailed example for your reference. The process involves creating Java Keystore and Truststore (keystore.jks & truststore.jks) files and adding them to a Workday Studio Assembly project.
- A Truststore informs Workday that the Client to whom Workday connects using SSL is a trusted party certified by a third-party Certification Authority.
- A Keystore informs the Client that Workday is a trusted party and contains the private key that identifies Workday to the client.
The following example outlines the steps necessary to set up the 3rd party certificates. In this example, we will walk through a connection between Workday and FreshService.
The endpoint we will use for this example is https://workdayfreshserviceintg.ca-c1.cloudhub.io.
Step-by-Step Example
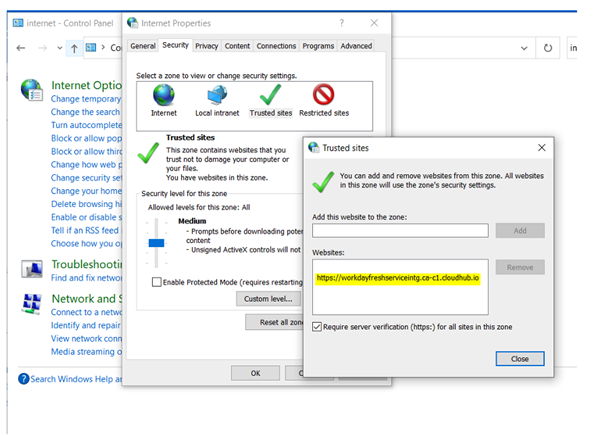
- Add the third-party endpoint https://workdayfreshserviceintg.ca-c1.cloudhub.io to the Trusted site on your computer.
- Navigate to the endpoint using your web browser, and extract the Certificate from the endpoint. This can be done by clicking on the padlock icon to the left of the URL, clicking the “connection is secure” message, then the “certificate is valid” message. This will open up the certificate viewer. Click on the “Details” tab, and then click on the “Export selected certificate…” button.
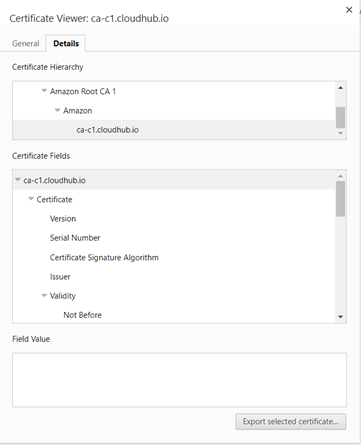
This will initiate the export process, which will result in several certificate files being saved to your local drive. In this example, the saved layers are:
- ca-c1.cloudhub.io.cer : This is the innermost layer
- cer : This is the intermediate layer
- cer : This is a second certificate file for the intermediate layer
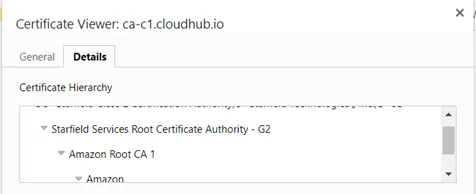
- Starfield_Services_Root_Certificate_Authority-G2.cer : This is the Root Certificate layer
- Create an empty keystore.jks and truststore.jks files using a java utility called keytool.
Commands are:
- keytool -genkey -alias Workday -keyalg RSA -keystore keystore.jks
- keytool -genkey -alias Workday -keyalg RSA -keystore truststore.jks
- Import all the layers into keystore.jks one by one starting at the bottom most layer.
Commands are:
- keytool -import -alias ca-c1.cloudhub.io -file ca-c1.cloudhub.io.cer -keystore keystore.jks
- keytool -import -alias Amazon -file Amazon.cer -keystore keystore.jks
- keytool -import -alias Amazon_Root_CA_1 -file Amazon_Root_CA_1.cer -keystore keystore.jks
- keytool -import -alias Starfield_Services_Root_Certificate_Authority-G2 -file Starfield_Services_Root_Certificate_Authority-G2.cer -keystore keystore.jks
- Import all the layers into truststore.jks one by one starting with the bottommost layer.
Commands are:
- keytool -import -alias ca-c1.cloudhub.io -file ca-c1.cloudhub.io.cer -keystore truststore.jks
- keytool -import -alias Amazon -file Amazon.cer -keystore truststore.jks
- keytool -import -alias Amazon_Root_CA_1 -file Amazon_Root_CA_1.cer -keystore truststore.jks
- keytool -import -alias Starfield_Services_Root_Certificate_Authority-G2 -file Starfield_Services_Root_Certificate_Authority-G2.cer -keystore truststore.jks
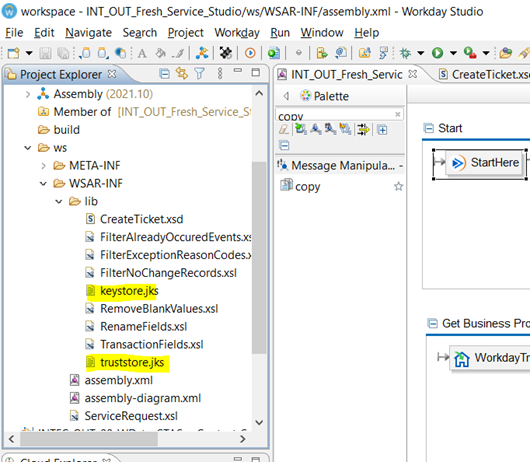
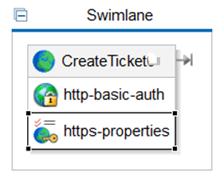
- Import keystore.jks and truststore.jks files to Workday Studio.
- Add code to connect to https://workdayfreshserviceintg.ca-c1.cloudhub.io using https-properties.
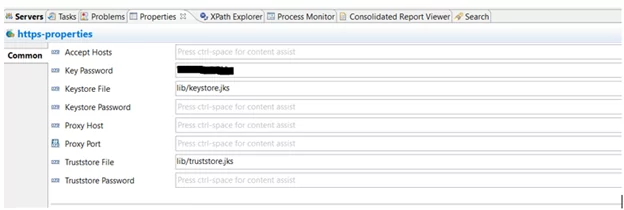
At this point, you will be able to verify that your connection has the additional security of signed 3rd party certificates.
Note, if the endpoint https://workdayfreshserviceintg.ca-c1.cloudhub.io changes, these steps above must be repeated. Also, when the certificate is about to expire, the process needs to be repeated with the updated certificate details.
Summary
In our experience, only some companies have taken the extra step to secure their Workday integrations using 3rd party certificates. We believe this is an important element of Workday security, but because the method requires a more complex and manual configuration, it often is overlooked.
If you want to learn more about securing your Workday integrations or some help implementing these steps above, please reach out to us – we’d be happy to help!


